Power Automate Approval Templates to Automate Business Processes

In an organization, I set up a Laptop Agreement process in which employees submit requests for laptops to work from home. These requests are stored in a SharePoint list named “Laptop Agreement.” Each request needs to be reviewed by the Releasing Officer. Once approved, the laptop allocation details must be added to another SharePoint list called Allocated Device.

For this requirement, I am not creating the flow from scratch. Instead, I am using one of the built-in Power Automate approval templates that Microsoft provides.

Based on my scenario, the perfect template is:

When an item is created in a SharePoint list, send approval and create item.

In this tutorial, I will show you how to use Power Automate approval templates to automate your business processes.

Set up a SharePoint List Based on Requirement

For this example, I created two SharePoint lists:

Employee Laptop Agreement: Stores the initial laptop request submitted by the employee, with the columns listed below.

Column NameData Types
TitleSingle line of text
Employee NamePerson
PositionSingle line of text
DepartmentChoice
Date ReleasedDate/Time
LaptopLookup (from Laptop Details list: Title, Brand, Model Number)
Releasing OfficerPerson
RemarksMultiple lines of text
when an item is created power automate

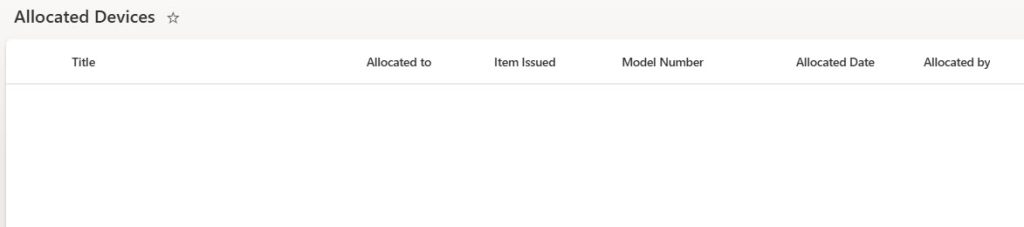
Allocated Devices: Stores details of approved and assigned laptops, with the columns listed below.

Column NameData Types
TitleSingle line of text
Allocated ToPerson
Item IssuedChoice
Model NumberSingle line of text
Allocated DateDate/Time
Allocated ByPerson
Automate Business Processes With Approval Templates

Create the Flow Using a Pre-Defined Approval Template

Power Automate makes this process easy with a pre-defined template that already includes the trigger, approval step, and item creation action. Now follow the steps below:

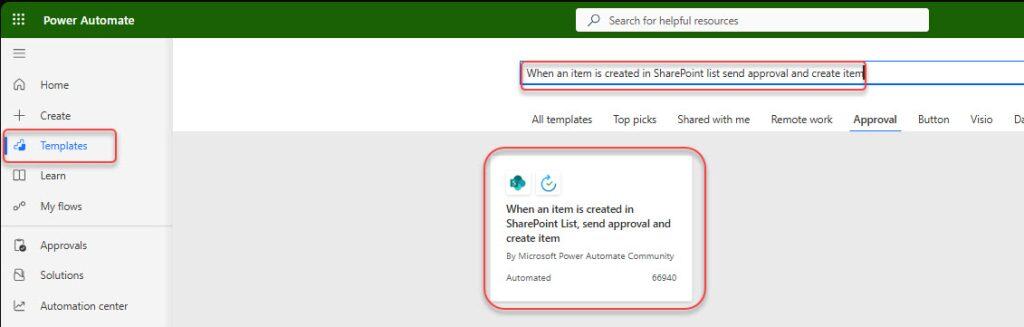
  1. Open Power Automate, go to the Templates section, and search for “When an item is created in SharePoint list, send approval and create item.” Select this template to get started.
Power Automate Built-In Approval Templates
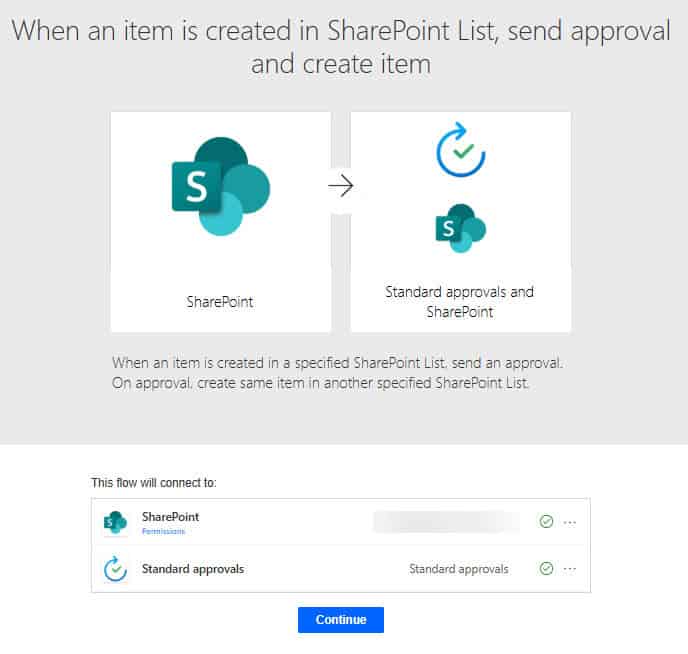
  1. Next, set up the required connections and click Continue to proceed.
Prebuilt Approval Templates in Power Automate
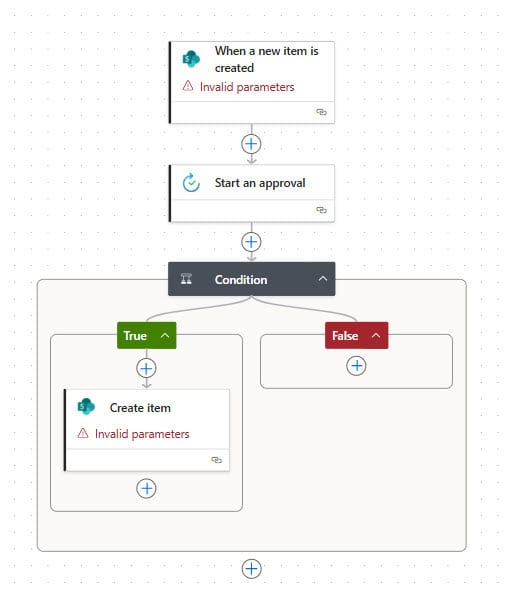
  1. After clicking Continue, you’ll see the pre-built flow template loaded in Power Automate.
Power Automate Templates for Business Approvals

Customize Template Based on the Requirements

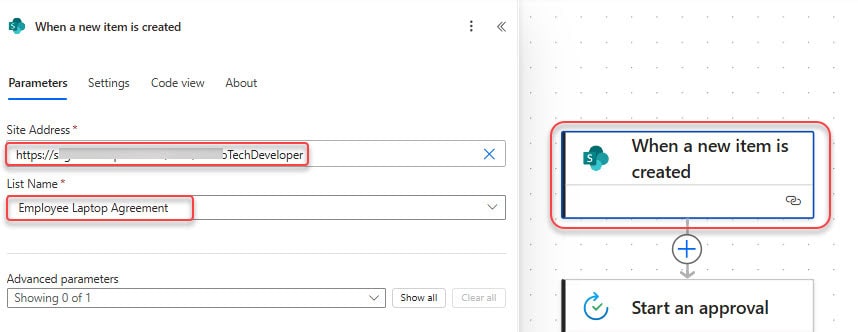
  1. Provide the required details in the When an item is created action by selecting your SharePoint site address and the SharePoint list name.
Power Automate Approval Process Templates
  1. In the Start an approval action, configure the following:
    • Approval type: Approve/Reject – First to respond
    • Title: Approval Request
    • Assigned to: Enter the Releasing Officer’s email address from the trigger.
    • Details: Add the information you want the approver to review before making a decision.
Hello @{triggerBody()?['ReleasingOfficer/DisplayName']},

A new laptop request has been submitted and requires your approval.

Employee Name: @{triggerBody()?['EmployeeName/DisplayName']}
Position: @{triggerBody()?['Position']}
Department: @{triggerBody()?['Department/Value']}
Laptop Requested: @{triggerBody()?['Laptop_x003a__x0020_Model_x0020_/Value']}
Date Released: @{formatDateTime(triggerBody()?['DateReleased'],'dd/MM/yyyy HH:mm tt')}
Remarks: @{triggerBody()?['Remarks']}

You can view the full request using the link below:  
[Click Here](@{triggerBody()?['{Link}']})

Please review the request and take the appropriate action.

Thank you,  
Power Automate Laptop Request System
Power Platform templates
  1. In the Condition action, we don’t need to change anything. We’ll keep it as it is:
@{outputs('Start_an_approval')?['body/response']} id equal to Approve
Create a cloud flow from a template in Power Automate

This condition checks whether the approver selected Approve. If yes, the flow will continue to create the item in the second SharePoint list.

  1. Click Add an action inside the If yes branch to update the item after the approval response. Select the Update item action and provide the following details:
    • Site address: Choose your SharePoint site
    • List name: Select the SharePoint list
    • Id: Map the ID from dynamic content
    • Date released: Select Response date from dynamic content
    • Remarks: Enter Approved
Power Automate Approval Templates Made Easy
  1. Next, add the Create item action to insert a new record into the Allocated Devices list. Configure it with the following details:
    • Site address: Select your SharePoint site
    • List name: Choose the target list from dynamic content
    • Title: Map the Title from dynamic content
    • Allocated to Claims: Select the Employee Name (Claims) value
    • Item Issued Value: Select the Laptop value
    • Model Number: Choose the Model Number from dynamic content
    • Allocated Date: Select the Response date
    • Allocated By Claims: Choose the Approver email from dynamic content
Submit a cloud flow template to the Power Automate gallery
  1. Now, send an email to the requester. Click Add an action -> select Send an email (V2), and configure the following:
    • To: Select Employee Name from dynamic content
    • Subject: Provide the email subject (Your laptop request has been approved)
    • Body: Provide the email body
Hello @{triggerBody()?['EmployeeName/DisplayName']},

Your request for a laptop has been approved. The allocation details are now updated in the Allocated Devices list.

You can check your request status using the following link: Open Request

Thank you,
IT Equipment Team
Microsoft Power Automate Getting started with flow templates
  1. If the Request is Rejected (If no branch), click Add an action -> select Send an email (V2). Fill in the parameters:
    • To: Select Employee Name from dynamic content
    • Subject: Your laptop request has been rejected
    • Body:
Hello @{triggerBody()?['EmployeeName/DisplayName']},

Your request for a laptop has been reviewed and rejected by the approving officer, with the Following Comment: @{outputs('Start_an_approval')?['body/comments']}.

Please contact your manager or IT team for further details.

Thank you,
IT Equipment Team
Create Localized Flow Templates In Power Automate

Test the Flow

Once your flow is ready, test it to ensure everything works as expected. Follow these steps:

Go to the Employee Laptop Agreement SharePoint list and create a new item. Fill in all required fields, such as Employee Name, Department, Position, and Laptop requested.

SharePoint List Templates Power Automate

Once the item is created, the flow will trigger automatically. The assigned Releasing Officer will receive an approval request in Outlook and Microsoft Teams.

Power Automate Approval Templates to Automate Business Processes

The officer can Approve or Reject the request.

If approved:

  • The item in the Employee Laptop Agreement will be updated with Date Released and Remarks.
Customized Approval Workflow by Power Automate
  • A new item will be created in the Allocated Devices list with the laptop allocation details.
Business approvals templates overview in Power Automate
  • The employee receives an email notifying them of the approval.
Approval Process Templates in Power Automate

If rejected:

  • The employee receives a rejection email explaining that the request was declined.
How to Use Power Automate Approval Templates to Automate Business Processes

Conclusion

In this tutorial, we explored how to use the Power Automate template When an item is created in SharePoint list, send approval and create item to automate approval processes efficiently. Instead of making a flow from scratch, we can use Microsoft’s predefined templates in Power Automate and customize them to fit our business needs.

You may also like:

Leave a Comment

Power Apps functions free pdf

30 Power Apps Functions

This free guide walks you through the 30 most-used Power Apps functions with real business examples, exact syntax, and results you can see.

Live Webinar

Quiz App Using SharePoint Framework (SPFx)

Learn to built a complete Quiz Management solution that enables admins to create and manage quizzes, categories, questions, and settings with an easy automated setup process in SharePoint. It also includes an interactive quiz experience for users and a powerful dashboard to track participation, analyze results, and view detailed performance reports with charts and answer insights.

📅 2nd June 2026 – 10:00 AM EST | 7:30 PM IST

Download User registration canvas app

DOWNLOAD USER REGISTRATION POWER APPS CANVAS APP

Download a fully functional Power Apps Canvas App (with Power Automate): User Registration App