Let me be honest — the first time I needed to screenshot something in a Teams meeting, I fumbled around for a good minute. There’s no dedicated “screenshot” button in Teams, which throws a lot of people off. But once you know the right methods, it takes less than two seconds.
In this article, I’ll walk you through every way to take a screenshot in Microsoft Teams — whether you’re on Windows, Mac, or mobile. I’ll also show you how to paste that screenshot directly into a Teams chat, which is honestly the most useful part.
Why There’s No Built-In Screenshot Button in Microsoft Teams
Microsoft Teams doesn’t have a native screenshot button built into the app. This is by design — Teams relies on your operating system’s built-in screen capture tools. So instead of looking inside the Teams interface, you use your keyboard shortcuts or built-in OS tools, and then paste the result wherever you need it.
The good news? The methods are simple and work beautifully once you get used to them.
Take a Screenshot in Microsoft Teams
Let’s discuss 6 easiest ways to take a screenshot in Microsoft Teams with examples.
Method 1: Take a Screenshot in Microsoft Teams with Snipping Tool (Windows)
This is the method I use the most. It’s clean, precise, and gives you a notification you can act on immediately.
Steps:
- Open Microsoft Teams and navigate to the screen, chat, meeting, or content you want to capture.
- Press Windows + Shift + S on your keyboard.
- Your screen will dim slightly, and a small toolbar will appear at the top.
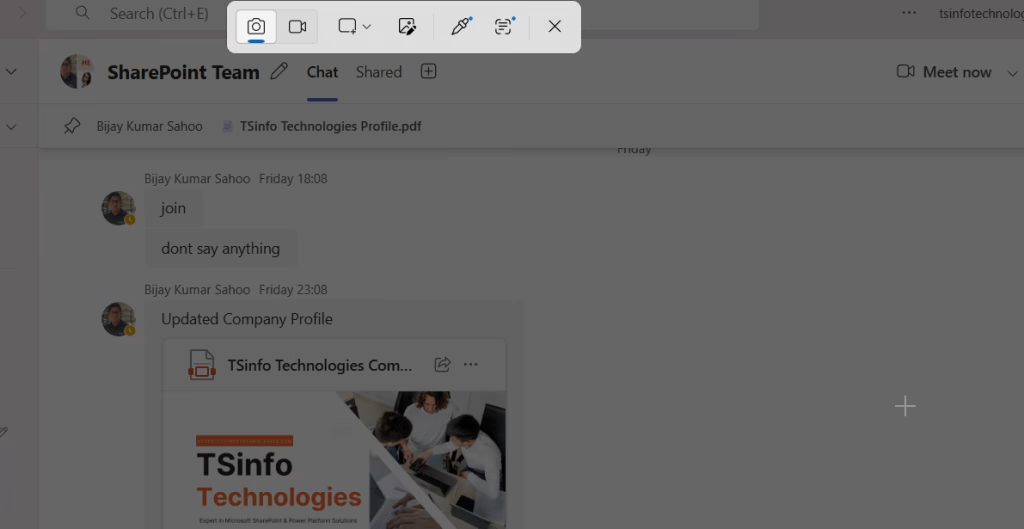
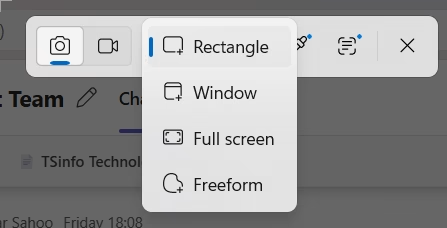
- You’ll see four capture options:
- Rectangular Snip – drag to select a custom area
- Freeform Snip – draw any shape around the area
- Window Snip – click to capture a specific open window
- Full-screen Snip – captures the entire screen
- Select your preferred mode, make your selection, and release the mouse.
- The screenshot is automatically copied to your clipboard.
- Go to the Teams chat box, click inside it, and press Ctrl + V to paste it directly.
- Hit Send.
Pro tip: After you press Windows + Shift + S and take the snip, a notification pops up in the bottom-right corner. Click on it to open the Snipping Tool editor, where you can annotate, crop, or save the image as a file before sharing.
Method 2: Take Screenshot in Microsoft Teams Using Print Screen Key
If you just need a fast full-screen capture with zero fuss, the Print Screen key is your friend.
Here’s how it works:
- PrtScn – Captures the entire screen and copies it to the clipboard. Nothing saves automatically, but you can paste it anywhere.
- Alt + PrtScn – Captures only the active window (so if Teams is your active window, it’ll capture just that).
- Windows + PrtScn – Captures the full screen AND automatically saves it as a file in your Screenshots folder inside Pictures.
Steps to use this in Teams:
- Open Teams to the screen you want to capture.
- Press PrtScn (or Alt + PrtScn for just the Teams window).
- Click inside the Teams chat message box.
- Press Ctrl + V to paste the screenshot.
- Hit Send.
This one is fast but gives you less control over what you capture. If your screen is cluttered with other open windows, use Method 1 instead.
Method 3: Take a Screenshot in Microsoft Teams Using Snipping Tool App
The Snipping Tool is a standalone Windows app that gives you extra control — especially if you want to annotate the screenshot before sharing it.
Steps:
- Press the Windows key and type Snipping Tool in the search bar, then open it.
- Click New to start a new capture.
- Select your snip type (Rectangular, Freeform, Window, or Fullscreen).
- Navigate back to Teams while the Snipping Tool is active and select the area you want to capture.
- The screenshot will open inside the Snipping Tool editor.
- Use the pen, highlighter, or eraser tools to annotate if needed.
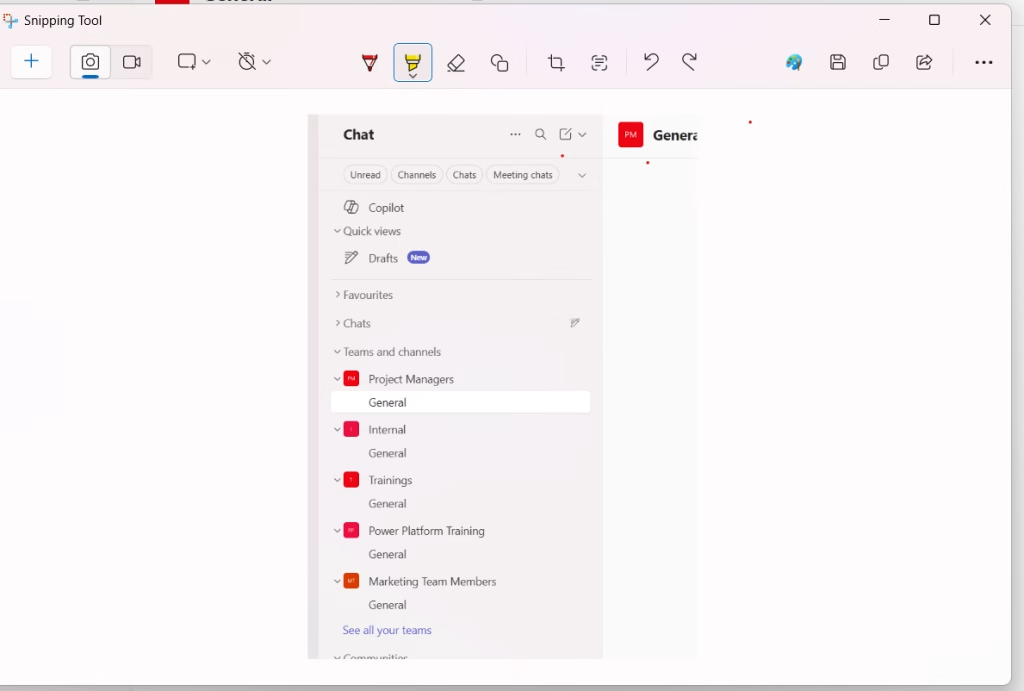
- Click File > Save As to save it, or simply press Ctrl + C to copy it, then paste it into your Teams chat with Ctrl + V.
This method is especially handy when you need to circle something, draw an arrow, or highlight a section before sharing it with a colleague.
Method 4: Take a Screenshot in Microsoft Teams on Mac
If you’re on a Mac, Apple gives you some solid built-in screenshot shortcuts that work perfectly with Teams.
Here are the main shortcuts:
- Command + Shift + 3 – Captures the entire screen and saves it to the desktop automatically.
- Command + Shift + 4 – Turns your cursor into a crosshair. Click and drag to select a specific area. The screenshot saves to your desktop.
- Command + Shift + 4, then Space – Lets you click on a specific window (like the Teams app window) to capture just that.
- Command + Shift + 5 – Opens the Screenshot toolbar with all options, including screen recording.
Steps to paste a screenshot into Teams on Mac:
- Take your screenshot using one of the shortcuts above.
- For Command + Shift + 4, your screenshot saves to the desktop as a PNG file.
- To paste into Teams, open your Teams chat, click the message box, and press Command + V — this works if the image was copied to the clipboard (it usually is with Command + Shift + 4 by default in recent macOS versions).
- Alternatively, drag and drop the saved file from your desktop directly into the Teams chat box.
Method 5: Screenshots on Mobile (iOS and Android)
Capturing a screenshot in Teams on your phone is straightforward — just use your phone’s built-in screenshot shortcut. There’s no special Teams-specific method required.
On iPhone:
- Face ID models (iPhone X and later): Press the Side button + Volume Up button at the same time.
- Home button models (iPhone 8 and earlier): Press the Home button + Side button together.
On Android:
- Press Power + Volume Down at the same time. (This can vary slightly depending on your phone manufacturer — Samsung, OnePlus, and others may have slightly different shortcuts or gestures.)
After taking the screenshot on mobile:
- Your screenshot saves to your phone’s camera roll or gallery.
- Go back to your Teams app and open the chat where you want to share it.
- Tap the attachment icon (paperclip) in the message bar.
- Select the screenshot from your gallery and send it.
One thing to know about mobile: Some organizations have IT policies that disable screenshots inside Teams meetings on mobile devices. If you find that your screen goes black when you try to screenshot, this is likely a security policy set by your IT admin — not a bug.
Method 6: Third-Party Tools (For Power Users)
If you frequently need to screenshot, annotate, and share in Teams, it might be worth considering a dedicated screen capture tool. Some popular options include:
- Snagit (by TechSmith) – Extremely powerful. You can capture scrolling screens, annotate them with arrows and callouts, and share them directly in Teams.
- Greenshot – Free and lightweight. Quick annotation features and direct clipboard integration.
- ShareX – Free and open source. Packed with features including auto-upload and workflow automation.
These tools are especially useful if you’re creating documentation, writing tutorials, or regularly sharing annotated screenshots in team channels.
How to Share a Screenshot Directly in a Teams Chat
Regardless of which method you used to capture the screenshot, here’s the universal way to share it inside Teams:
Option 1 – Paste from clipboard:
- Copy your screenshot to the clipboard (any of the methods above do this automatically).
- Open the Teams chat or channel where you want to share it.
- Click inside the message compose box.
- Press Ctrl + V (Windows) or Command + V (Mac).
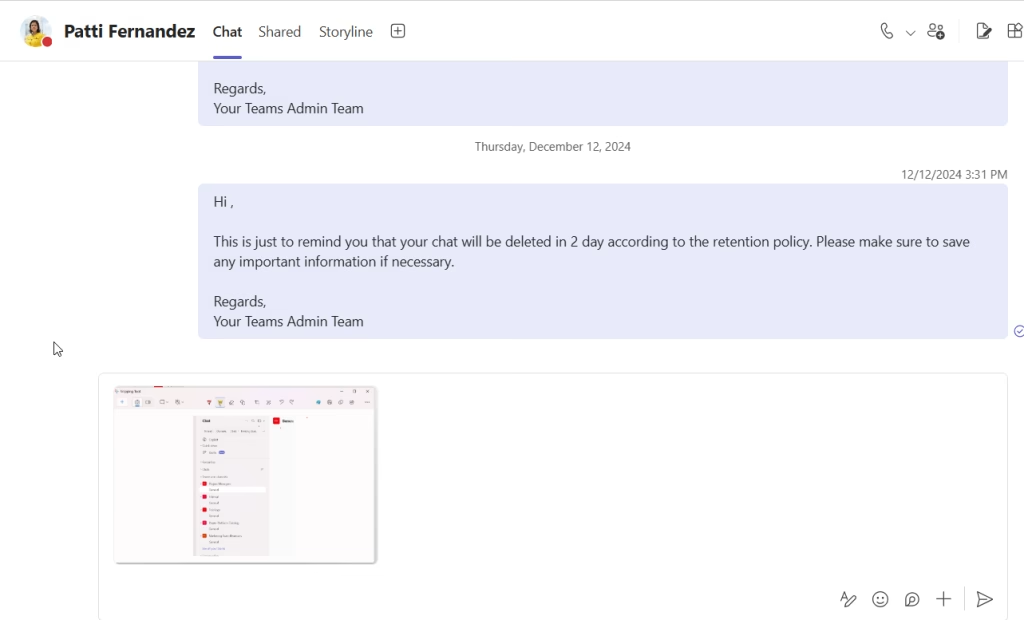
- Your screenshot will appear in the message box as a preview.
- Press Enter or click Send.
Option 2 – Attach as a file:
- Save your screenshot to your computer.
- In the Teams chat, click the Attach icon (paperclip) below the message box.
- Select Upload from this device and choose your screenshot file.
- Add a message if needed and click Send.
Quick Tips to Get the Most Out of Screenshots in Teams
- Name your screenshots with something meaningful before saving (e.g., “budget-review-may.png”) so you can find them easily later.
- Use annotations — Even a quick red circle around the relevant area saves your colleague time and confusion.
- Don’t screenshot sensitive data without checking your organization’s data handling policies, especially in regulated industries.
- Use Snipping Tool’s delay feature if you need to capture a dropdown menu or tooltip that disappears when you press the keyboard shortcut. Open Snipping Tool > click the dropdown next to New > set a delay of 3–5 seconds.
Common Issues and Quick Fixes
Screenshot comes out black or blank:
This usually happens inside a Teams video meeting when hardware acceleration is turned on. Try pressing Windows + PrtScn instead of using the Snipping Tool, or temporarily switch to a different capture method.
Can’t paste screenshot into Teams chat:
Make sure you clicked inside the message box before pressing Ctrl + V. Sometimes clicking elsewhere in the Teams window means the cursor isn’t in the right place.
Screenshot only captures part of the screen:
If you’re using a dual-monitor setup and only one screen is captured, try pressing Windows + Shift + S and manually selecting the area across both screens.
Wrapping Up
Taking a screenshot in Microsoft Teams is really just about knowing which keyboard shortcut to reach for. On Windows, Windows + Shift + S is your go-to. On Mac, Command + Shift + 4 does the job perfectly. On mobile, your phone’s built-in shortcut handles everything.
Once you capture the screenshot, paste it straight into the Teams chat with Ctrl + V, and you’re done. It’s one of those small things that, once you get the hang of it, becomes second nature.
You may also like the following tutorials:
- Create a Group in Teams
- Enable GIFs in Microsoft Teams
- Add External User to Teams
- Connect to Microsoft Teams using PowerShell
- Your Organization Has Disabled This Device in Teams

Hey! I’m Bijay Kumar, founder of SPGuides.com and a Microsoft Business Applications MVP (Power Automate, Power Apps). I launched this site in 2020 because I truly enjoy working with SharePoint, Power Platform, and SharePoint Framework (SPFx), and wanted to share that passion through step-by-step tutorials, guides, and training videos. My mission is to help you learn these technologies so you can utilize SharePoint, enhance productivity, and potentially build business solutions along the way.

