
In my organization, I am creating a Power BI dashboard, and I often encounter columns with blank or null values. These empty fields can cause issues in calculations and visuals. To fix this, I started using Power Query and DAX to check for blank or null values and create clean, meaningful columns.
In this tutorial, I will show you how to handle blank and null values in different ways. We will create new columns using Power Query and write M code.
Here I will cover:
- Add Column If Column Is Null in Power BI Power Query
- Add Column If Column Is Blank in Power BI
- Replace Blank/Null with a Default Value using Power Query in Power BI
Add Column If Column Is Null in Power BI
For this example, I am using a simple Customer Details table. This table contains customer email addresses and phone numbers, some of which are null.
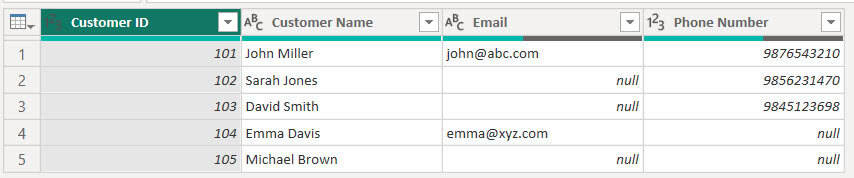
In this table, some Email and Phone Number fields contain null values. This means the data is completely missing, not even an empty string.
So, I want to add a new column to check null values.
To do this, follow the steps below:
- Open Power BI Desktop under the Home tab, click Transform Data to open Power Query Editor.

- Select the table Customer Details in the left panel. Go to the Add Column tab, click Custom Column.

- In the Custom Column window, enter:
- New Column Name: Email Null Check
- Formula:
if [Email] = null then "Null Email" else "Not Null"
Now you will see a new column that identifies which rows have null email values.

Click Close & Apply to load the changes back into Power BI.
If you want to add the column using M code directly:
= Table.AddColumn(Source, "Email Null Check", each if [Email] = null then "Null Email" else "Not Null")Add Column If Column Is Null in Power BI
For this example, I am using the same table shown above. Since the Phone Number column has blank values, I want to add a new column using DAX that returns ‘Not Provided’ when the phone number is blank, and ‘Provided’ when it is not blank.
To do this, follow the steps below:
- Open Power BI Desktop and load your data, then, under the Modeling tab, click New Column.
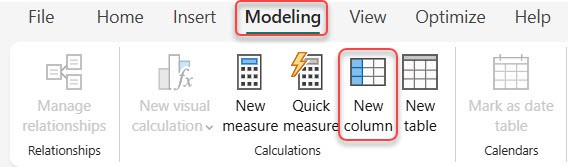
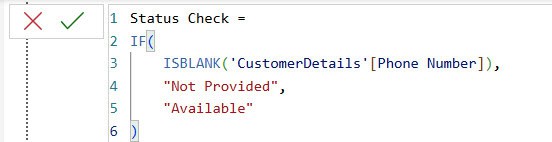
- In the formula bar, add the following DAX expression:
Status Check =
IF(
    ISBLANK('CustomerDetails'[Phone Number]),
    "Not Provided",
    "Available"
)
- To check the result, go to the Table view and select the CustomerDetails table. You will now see the newly added column.

This way, you can add a column if columns are null in Power BI.
Replace Blank/Null with a Default Value using Power Query in Power BI
In some datasets, specific fields may be blank or null, and instead of leaving them empty, you may want to replace them with a default value such as “Not Available”, 0, or Unknown.
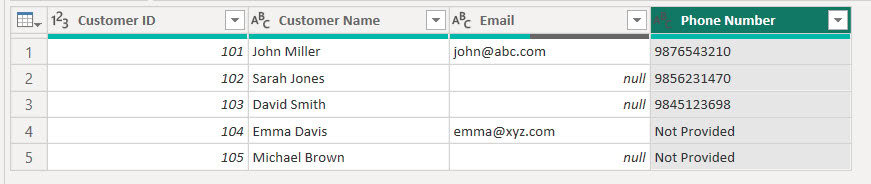
In the CustomerDetails table, the PhoneNumber column contains null values. I want to replace all nulls with the text “Not Provided”.
To do this, follow the steps below:
- In Power BI Desktop under the Home tab, click Transform Data.
- In the Power Query editor, click on the PhoneNumber column. Go to the Transform tab, click Replace Values.
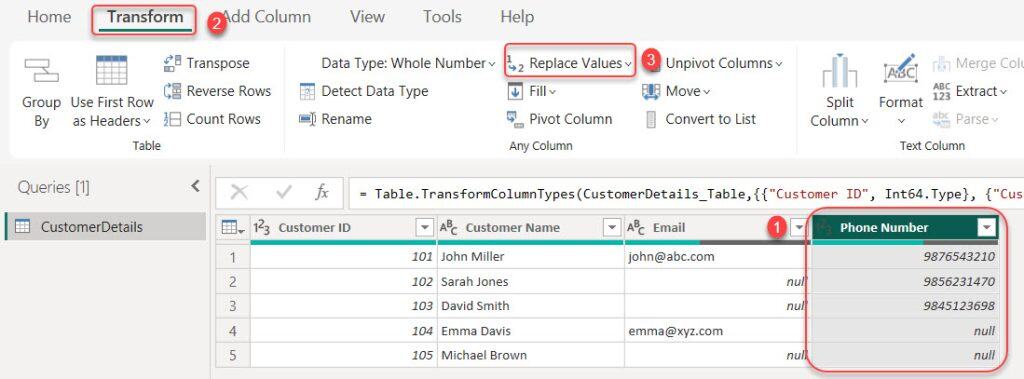
- A pop-up will open where you fill in the window like this:
- Value To Find: null
- Replace With: Not Provided
- Then click ok.

Note:
In my case, the Phone number is a Text data type. If your number is the one provided, it will show. You can give a number or 0.
- Our PhoneNumber column now contains “Not Provided” wherever the value was null without creating a new column.
In this tutorial, I explained different ways to handle blank and null values in Power BI. You learned how to add a column when a field is null using Power Query, how to add a column when a field is blank using DAX, and how to replace blank or null values with a default value.
Also, you may like some more Power BI Tutorials:
- Power BI Sum Multiple Columns
- Add Column If Contains in Power Query Power BI
- Power BI Slicer Multiple Columns
- Power BI Measure Subtract Two Columns
- Compare Two Columns in Different Tables in Power BI

Hey! I’m Bijay Kumar, founder of SPGuides.com and a Microsoft Business Applications MVP (Power Automate, Power Apps). I launched this site in 2020 because I truly enjoy working with SharePoint, Power Platform, and SharePoint Framework (SPFx), and wanted to share that passion through step-by-step tutorials, guides, and training videos. My mission is to help you learn these technologies so you can utilize SharePoint, enhance productivity, and potentially build business solutions along the way.