
One of my clients recently faced an issue with the SPFx web part. Actually, their web part triggers emails when specific changes are made to the files they uploaded. To fix their problem, I have imported their SPFx solution package into my system to update the code.
After updating the code, I need to build the package for deployment, but we got stuck because Im using the latest SPFx V1.21.11 and my Node version is V22. But the client’s SPFx solution is using the old version 10. To work on the client solution, I had to downgrade my Node version.
But side by side, Im also working for some other clients who are using the latest versions. In this case, I can’t downgrade or upgrade my Node version every time, which isn’t a good option either.
After researching, I found the best solution: NVM [Node Version Manager], which makes switching between node versions easy with simple commands. In this tutorial, I will explain how to use NVM and how to resolve issues that may arise during installation.
What is NVM?
NVM (Node Version Manager) is a tool that helps you use different versions of Node.js on the same computer. If one project needs an older Node version and another project needs a newer one, NVM lets you switch between them easily using simple commands. You don’t need to uninstall or reinstall Node again and again.
There are two types of NVM:
- nvm-windows = For Windows computers
- nvm-sh = For macOS, Linux, and WSL.
NVM allows you to easily upgrade to the latest Node.js versions while keeping older versions available for legacy projects.
Download NVM for Windows
When you go to the official NVM download page, you’ll notice that there are many versions of nvm-windows available. Beginners often get confused about which version to download, so I suggest downloading the latest NVM version or an older one based on your project’s needs.
In most cases, the latest version works fine. Download the latest version 1.2.2 from GitHub. In my case, I had a special requirement, so Im downloading the nvm version 1.1.12 from GitHub.
Note: Before installing NVM for Windows, uninstall any existing Node.js versions, as they may conflict with Node.js versions managed by NVM.
- Once you click the link above, a zip file named nvm-setup is downloaded to your local system, either to the Downloads folder or to any other folder you choose. Unzip that one, and within that, you will see nvm-setup as below.
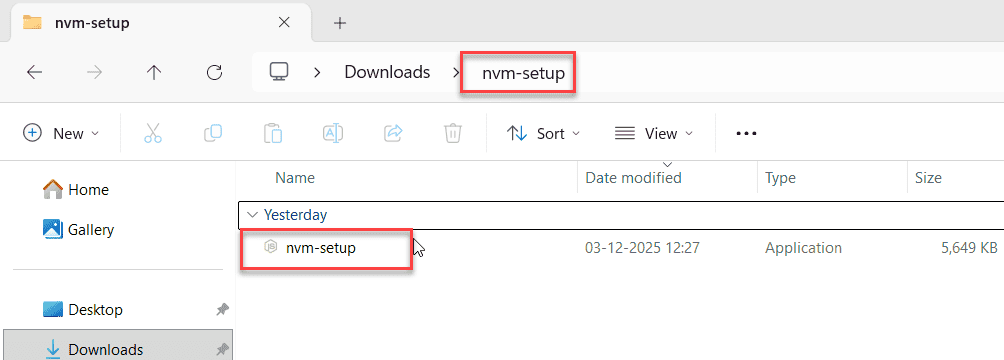
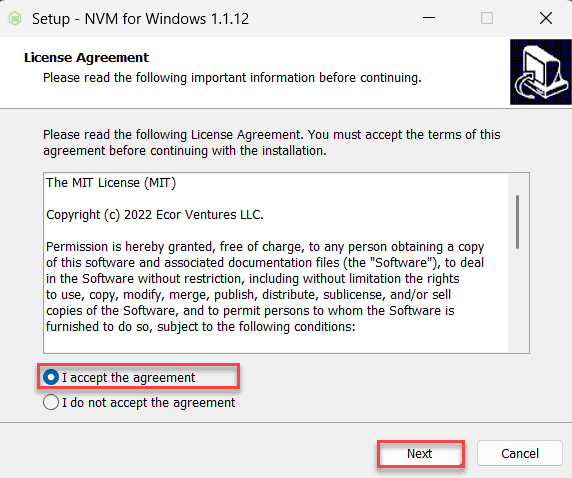
- Click nvm-setup; it will open a wizard to allow NVM into your system. Click Yes. Then, the following image will appear. I chose the I accept the agreement option and clicked the Next button.
- Select the installation location by clicking Browse, and then click Next.

- Select the directory for the installation of Node.js. Then click on Next.

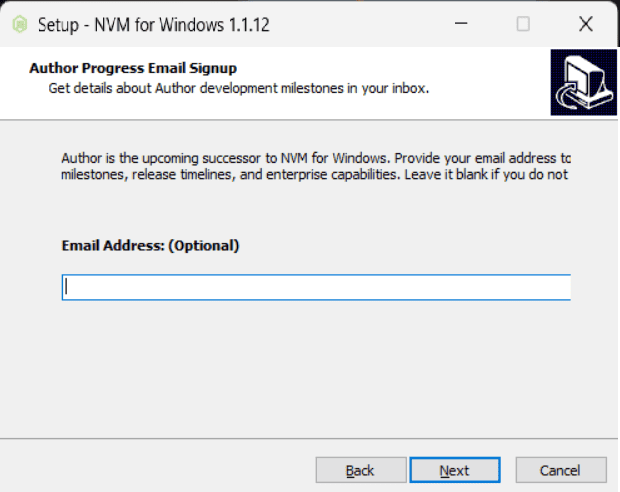
- This is for email subscription notifications, which can be completely disabled. You can check all options and click Next.

- Provide your email for subscriptions. This is optional; you can leave it blank.
- Click Install if you’re ok with the Destination location; if not, go back and change it.
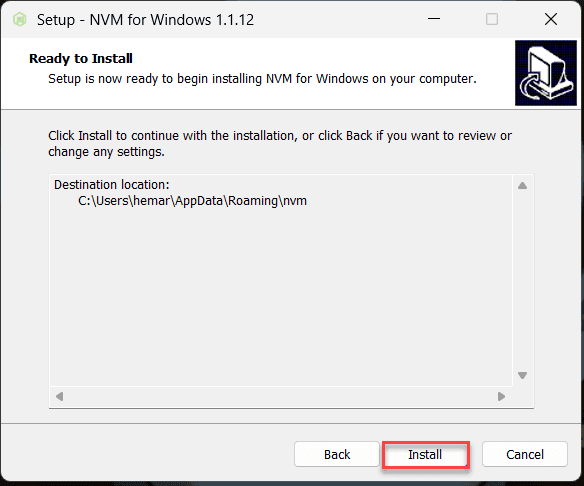
- This installs the nvm into your system. Once it is installed, open the command prompt and run the command below to check the nvm version.
nvm --versionIf the nvm version number is displayed, the installation was successful.
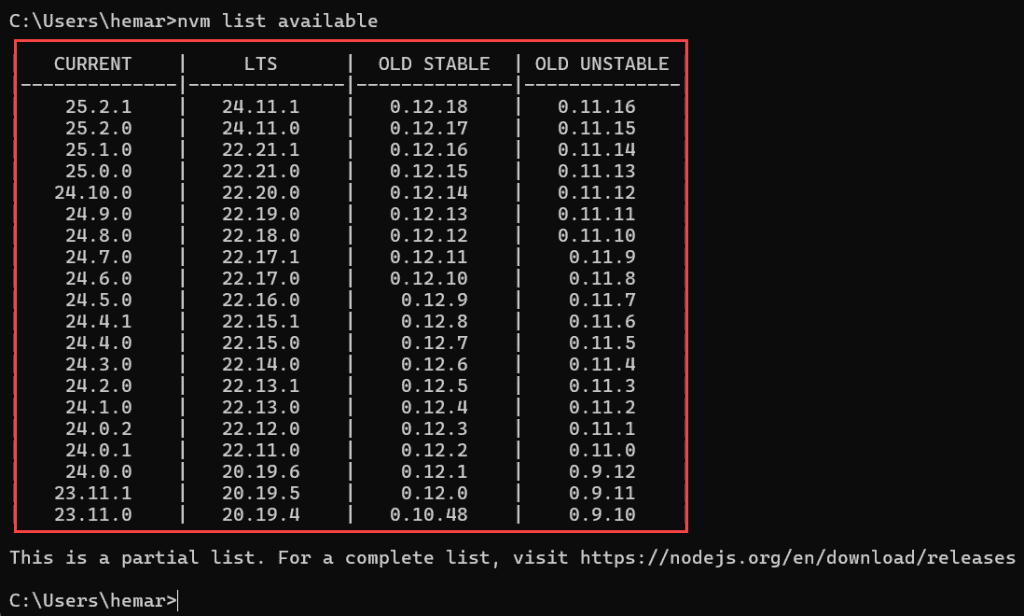
- To see all available Node.js versions that you can install using nvm, run the command below.
nvm list availableIn the image below, you can see the list of available Node.js versions that you can download with nvm.
Let’s see how to install Node.js using Node Version Manager in the section below.
Commands to Install & Uninstall Node.js
To install a specific version of Node.js using nvm, run the following command.
nvm install <version>Here, inplace of version, please specify the version number, for example, as below:
nvm install 22.21.1If you want to install the latest version, then run the command below.
nvm install --ltsTo see all the Node.js versions installed in your system, run the command below.
nvm listTo uninstall the Node.js version.
nvm uninstall <version>Switching Node.js Versions
Run the command below to switch to the specific Node.js version.
nvm use <version>Specify the version number inplace of <version>, for example:
nvm use 0.10.48To check the currently active Node.js version, run the command below.
nvm currentWorking with NPM
When we switch Node.js versions using Node Version Manager, npm is also switched to the version bundled with that Node.js version. So, to make a package available across all Node.js versions, we need to reinstall it for each version. Here is the command.
npm install -g <package-name>In the example below, I showed how to reinstall the Gulp, Yeoman, and SharePoint Generator packages after switching Node.js versions. Running this command is mandatory; otherwise, your gulp commands, such as build, serve, package, and yo @microsoft/sharepoint, etc., won’t work.
npm install -g gulp-cli
npm install -g yo
npm install -g @microsoft/generator-sharepoint
Error: Unable to install npm on older Node.js versions
If you installed the NVM latest version and are trying to install the very old versions of Node.js, you might face the following error.

error installing 0.10.48: open C:\users\<username>\AppDate\Local\Temp\nvm-npm-978772599\npm-v2.15.1.zip: The system cannot find the file specified.This basically means NVM was unable to download the old npm file for that Node version. Some of the new NVM releases no longer support installing such very old Node.js versions, so the command fails.
After trying a few options and searching GitHub Issue threads, I found that NVM version 1.1.12 still supports installing older Node.js versions, such as 0.10.x and 4.x, etc. So I downloaded and installed the NVM 1.1.12, and everything worked perfectly.
- I was able to install Node.js 0.10.48 and later.
- I was also able to install newer Node.js versions(16,18,20, etc)
- Switching between them works without any issues.
Even though NVM 1.1.12 is not the latest version, it is more stable for working with very old Node versions.
Conclusion
I hope you found this tutorial helpful! If you’re working with multiple versions of SPFx and Node.js on the same computer, then follow this article and use NVM to switch between the Node.js versions, without uninstalling and reinstalling.
In this tutorial, I explained what NVM is, how to download it, the basic commands for installing and uninstalling Node.js, how to switch between Node.js versions, how to work with npm, and how to resolve errors when installing very old Node.js versions.
Also, look at some SPFx blog posts below:
- Delete node_modules from SPFx solution (rimraf)
- a ‘primitive value’ or ‘StartObject’node was expected
- Create a SharePoint List or Library Using No Framework in SPFx Web Part
- SPFx CRUD Operations using No JavaScript Framework
- Send Email in SPFx using Microsoft Graph API and PnP JS

Hey! I’m Bijay Kumar, founder of SPGuides.com and a Microsoft Business Applications MVP (Power Automate, Power Apps). I launched this site in 2020 because I truly enjoy working with SharePoint, Power Platform, and SharePoint Framework (SPFx), and wanted to share that passion through step-by-step tutorials, guides, and training videos. My mission is to help you learn these technologies so you can utilize SharePoint, enhance productivity, and potentially build business solutions along the way.